
How to use SEO tests
What is it?
SEO Tests help you measure the real impact of your SEO changes.
Instead of guessing whether a title rewrite, a batch of new internal links, or a technical fix actually helped, you set up a test on a page or a group of pages and Sitechecker compares their performance before and after the change.
You can run a simple before and after test, or add a control group to separate your results from wider trends like seasonality or a Google update.
How does it work?
1/ You choose the pages you changed, the period you want to measure, and the metrics you care about.
2/ Sitechecker pulls data from Google Search Console, and from Google Analytics 4 if you connect it, for your test period.
3/ Then it automatically matches a comparison period of the same length right before it. The comparison period is aligned by day of the week, so weekends line up with weekends and the comparison stays fair.
4/ After that you get a chart, metric cards, and a table that show the difference between the two periods, plus a clear result against the goal you set.
Two types of tests
Before you start, you pick one of two test types.
Before / After Test compares your pages during the test period against the comparison period right before it. This is the standard option and works for most cases.
Test with Control Group does the same thing, but adds a second set of pages that you did not touch.
By comparing your test pages against this control group, you can tell whether a change came from your work or from a wider trend that affected all pages.
How to create a test
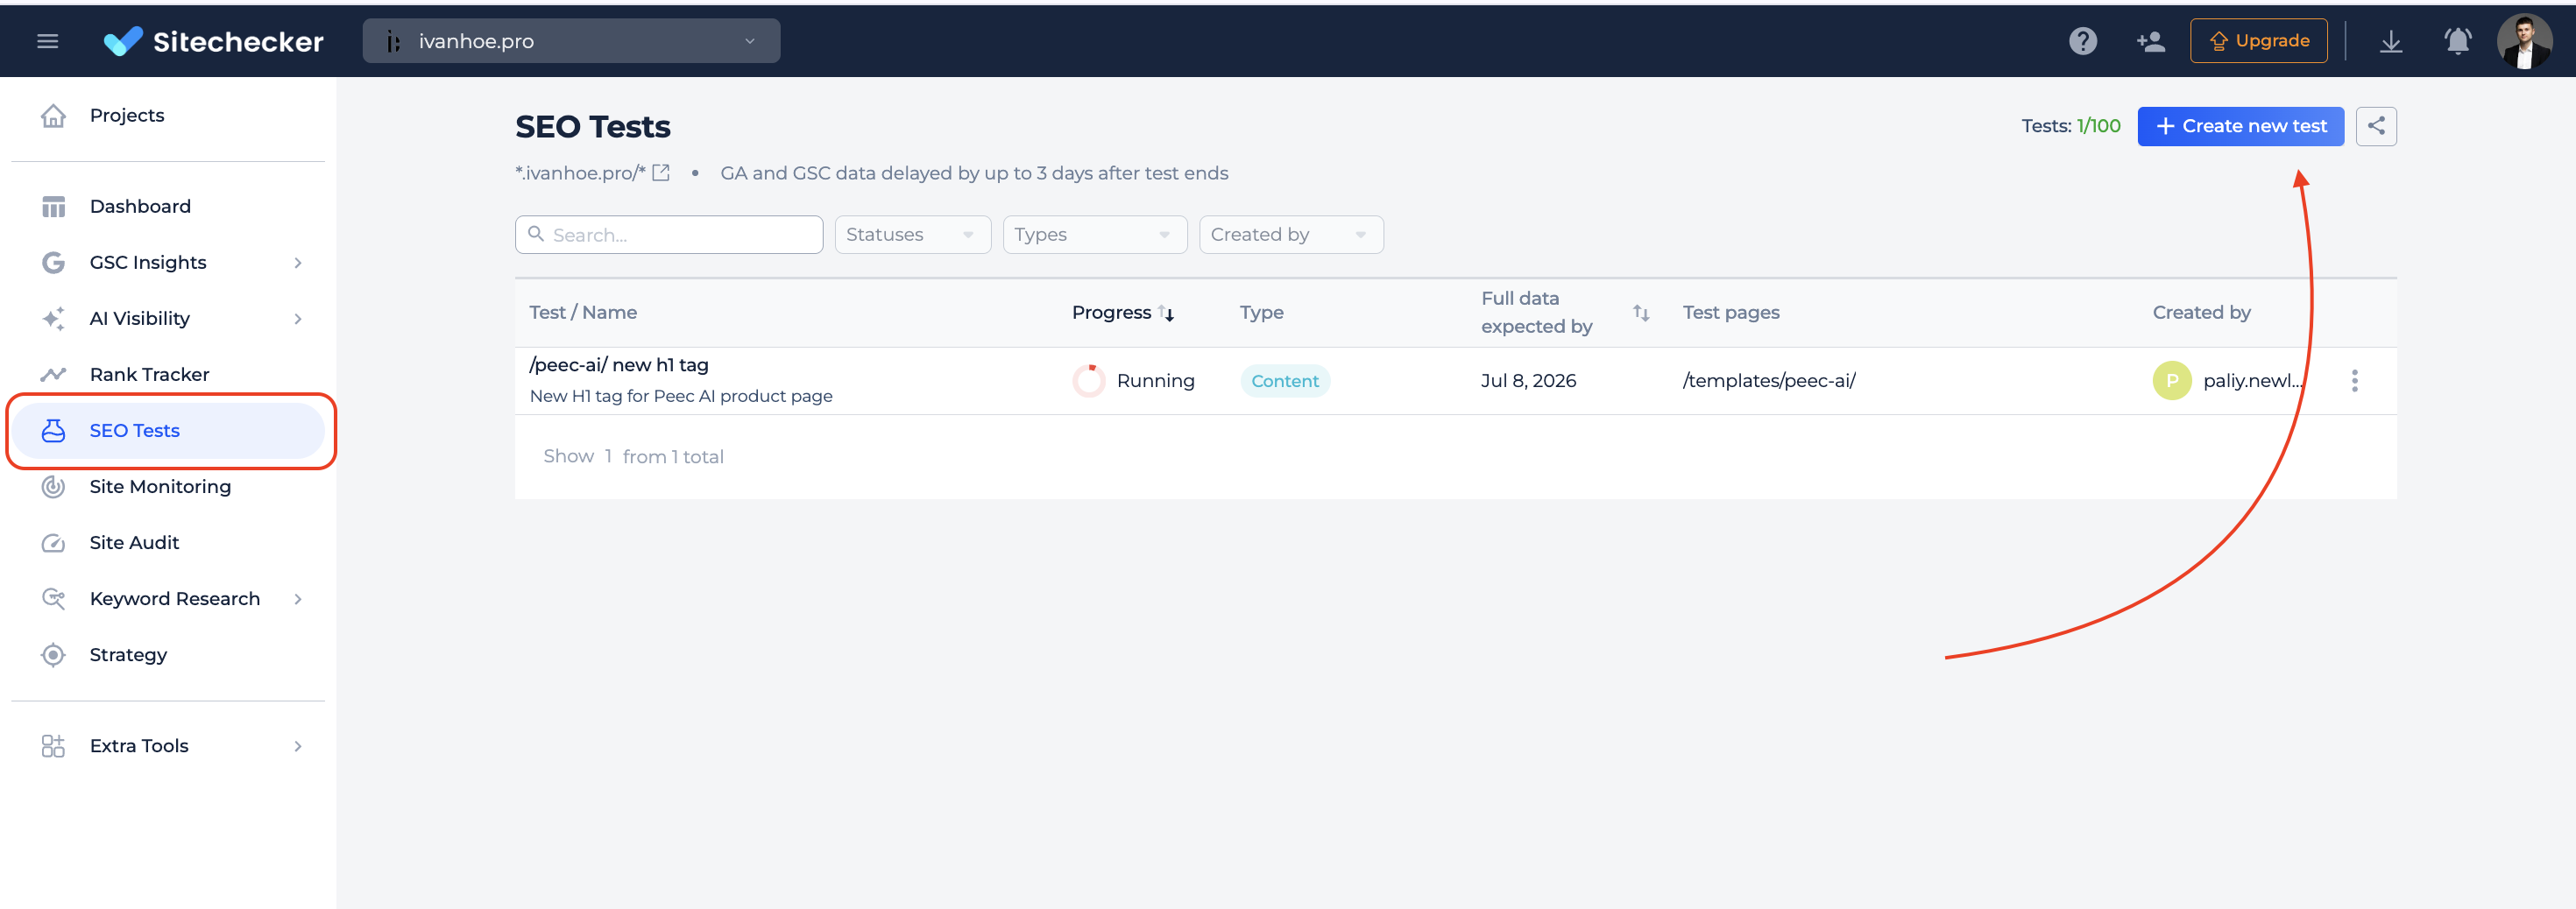
Tests are created from the SEO Tests Log page.
Click Create New Test to open the setup popup, then follow the steps below.
Choose your test type
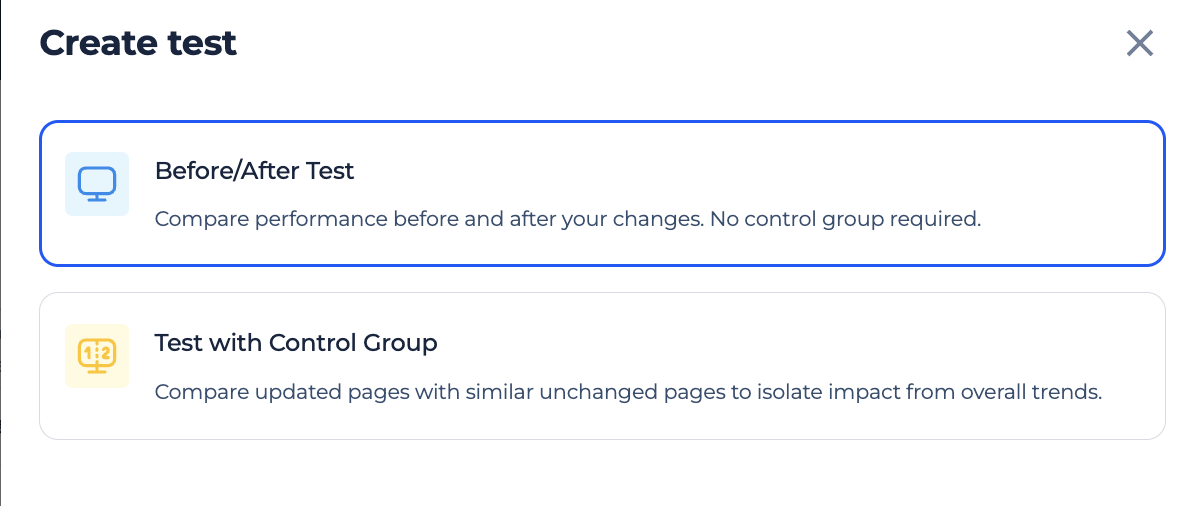
Pick either Before / After Test or Test with Control Group.
Your choice decides how many steps you see next. You can always go back through the setup steps, but you cannot switch the test type once you move forward, so choose the one that fits your experiment.
Add test info
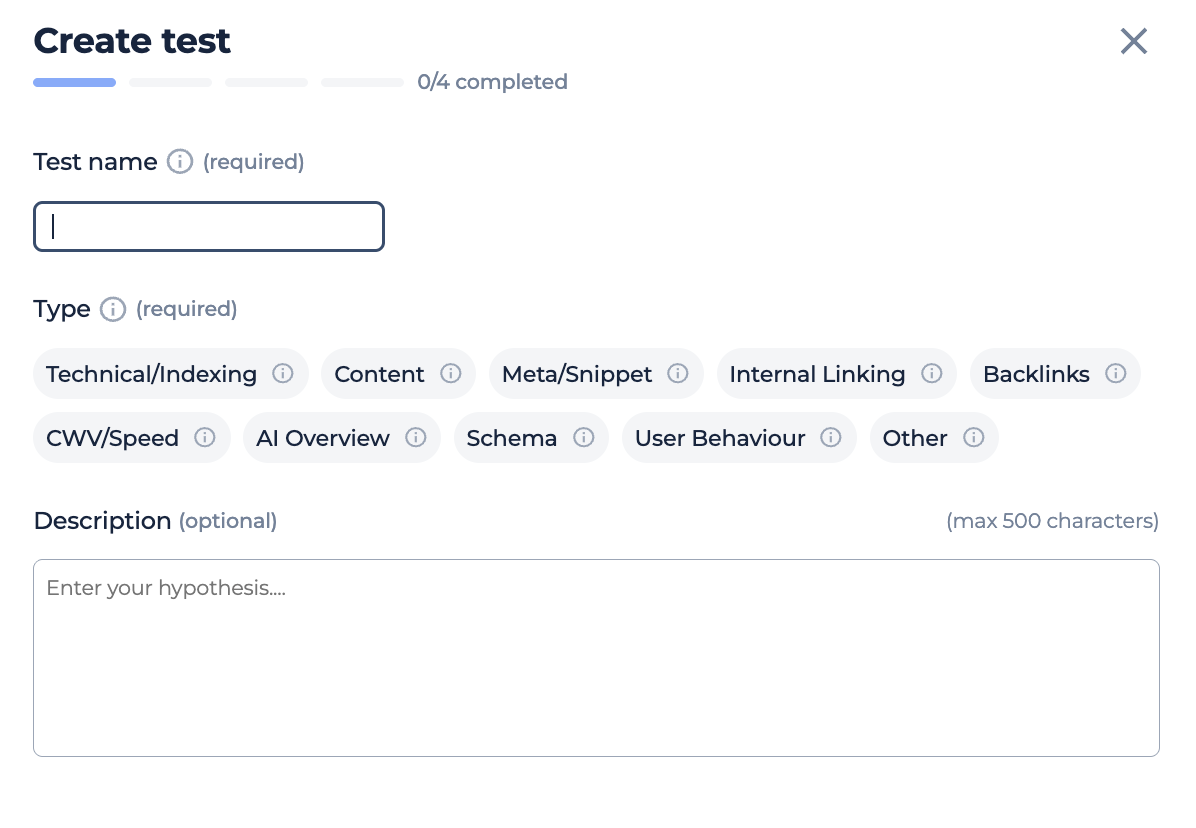
Choose a Type that matches the change you are testing. This is also required, and it helps you organize and filter your tests later. You can pick one type per test:
- Technical / Indexing
- Content
- Meta / Snippet
- Internal Linking
- Backlinks
- CWV / Speed
- AI Overview
- Schema
- User Behaviour
- Other
You can also add an optional Description.
Set the test scope
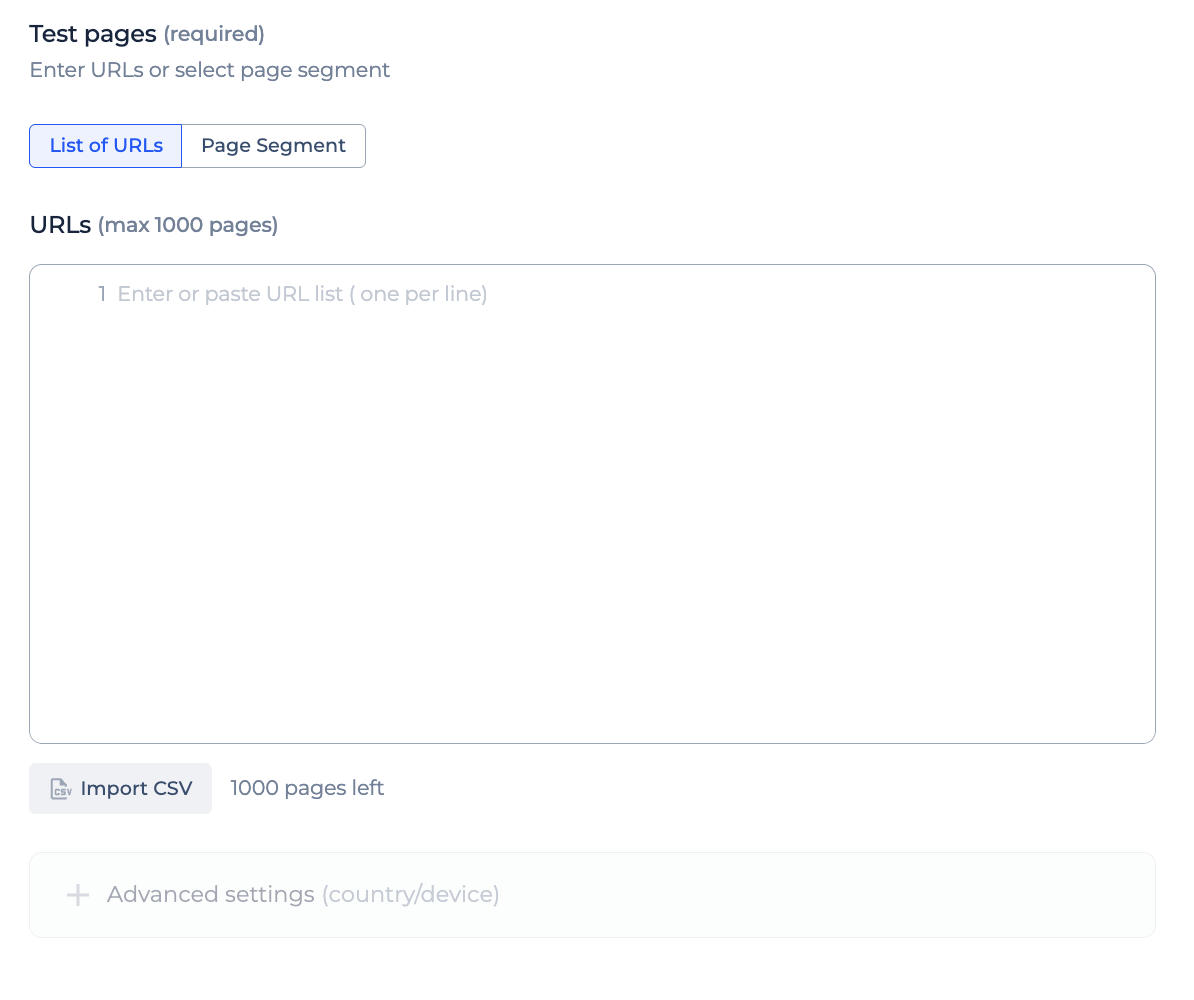
Here you choose the pages you want to test.
This step needs Google Search Console connected, because the page list comes from your GSC data.
You can define your pages in two ways using the tab switcher:
List of URLs lets you paste your URLs, one per line, up to 1000 pages. You can also click Import CSV to upload a file with your list. A counter shows how many pages you can still add.
Page Segment lets you pick one of the segments you already created in this project. If you do not have any segments yet, you can create them in Project Settings.
Under Advanced settings you can narrow the test by Country and Device.
One thing to keep in mind here: if you set a specific country or device, GA4 metrics will not be available for this test because of current technical limits. You will see a notice about this, and it will show up again on the metrics step.
Add control pages (Test with Control Group only)
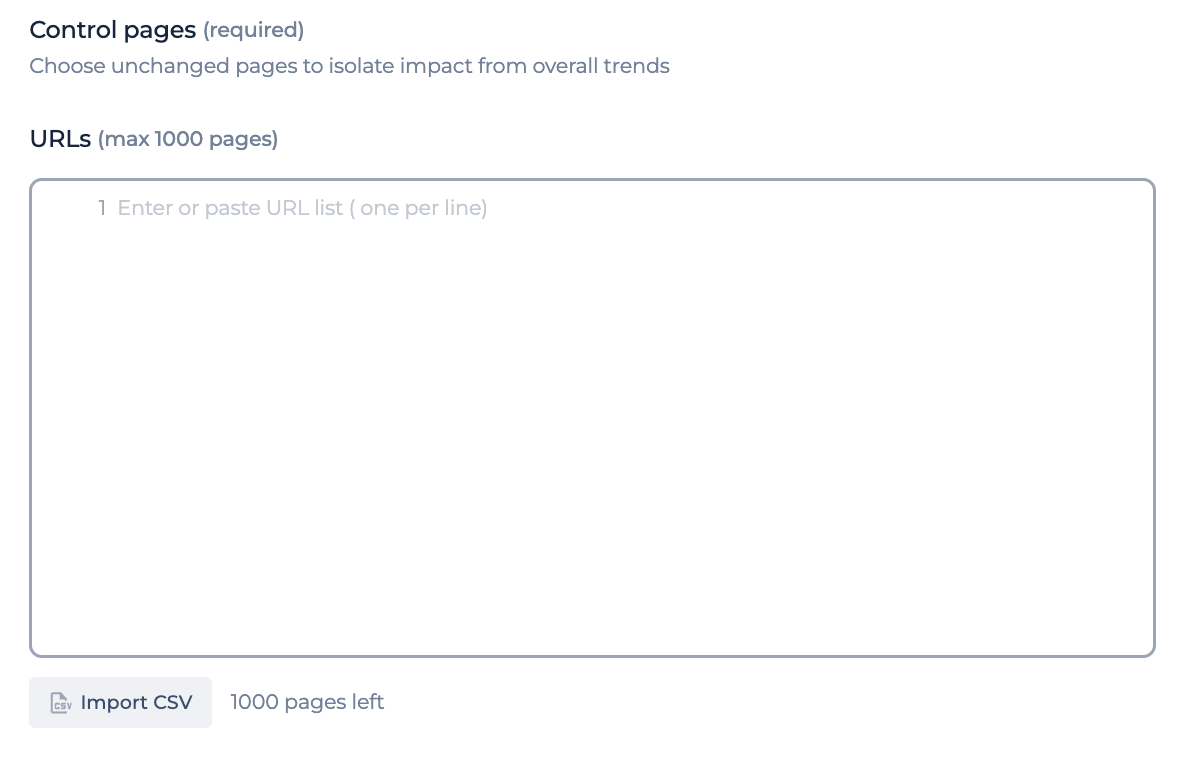
This step only appears for tests with a control group. Here you add the pages for your control group, the ones you did not change. You add them the same way as in List of URLs, either by pasting them or importing a CSV. Segments are not available here.
Your control pages cannot include any URL that is already in your test group. If there is an overlap, the duplicate URLs are highlighted and you will not be able to continue until you remove them.
Set the test period
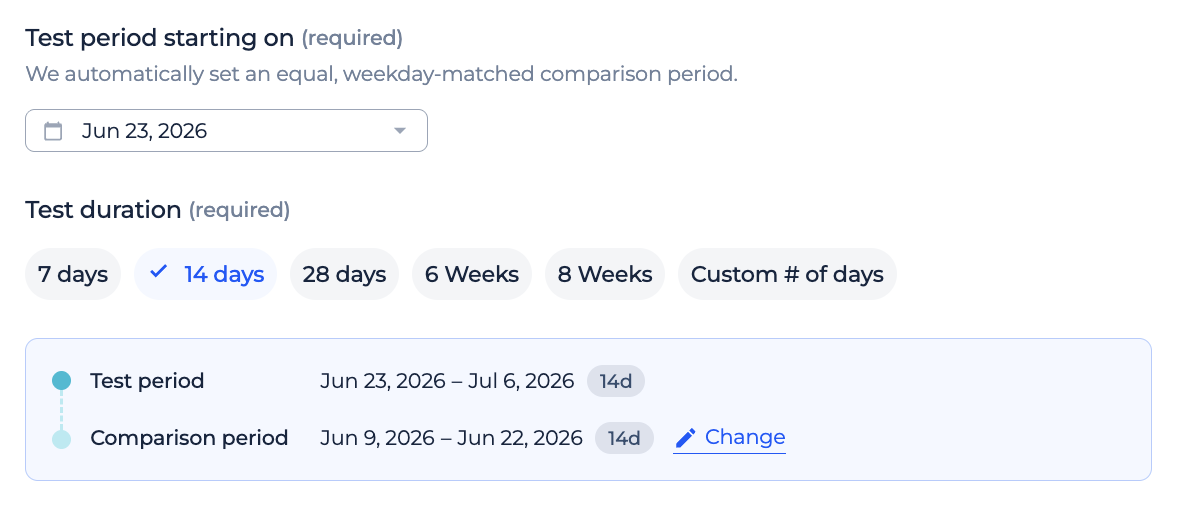
Test period starting on defaults to today. You can pick a date in the past or the future, within 6 months back and 6 months forward.
Test duration defaults to 14 days. You can choose one of the presets (7 days, 14 days, 28 days, 6 weeks, 8 weeks) or set a custom number of days up to 182.
If you do not want to use the closest period, for example because of seasonality, click Change next to the comparison period and set Comparison period ends on. Sitechecker will then find the closest matching period that ends on or before that date.
Choose your data and goal
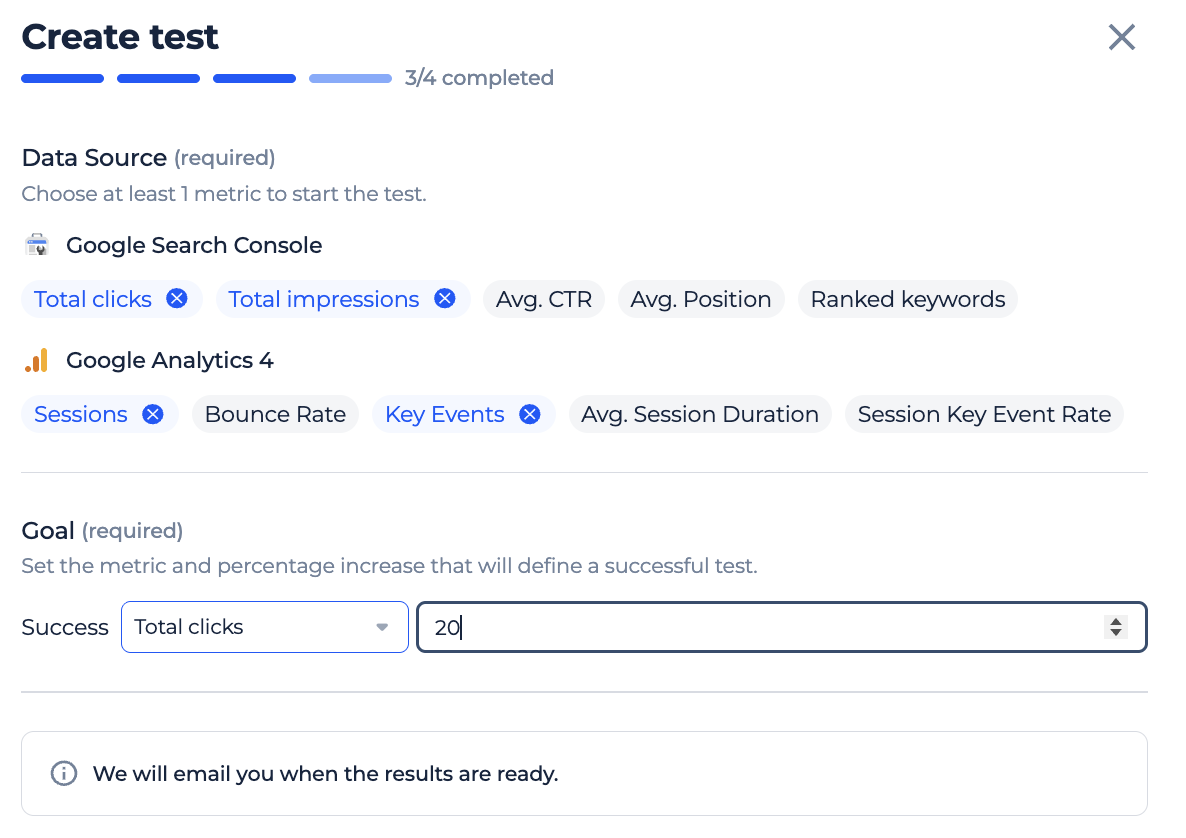
On the final step, you choose which metrics to track and set the goal for your test.
From Google Search Console, you can choose any of these:
- Total Clicks
- Total Impressions
- CTR
- Position
- Ranking Keywords
If Google Analytics 4 is connected and you did not apply a country or device filter, you can also choose GA4 metrics:
- Sessions
- Bounce Rate
- Key Events
- Average Session Duration
- Session Key Event Rate
You need to select at least one metric in total.
Then set your Goal. This is required. Pick the metric you want to measure success by, the dropdown only shows metrics you already selected, and enter the target growth as a percentage, for example Clicks +20%. When the test finishes, Sitechecker uses this goal to mark the result as achieved or not.
After everything is set, finish the setup. You will be taken straight to your new test page, and you will get an email with the result once the test is complete.
How to read your test results
Your test page is where you work with the data. It looks and behaves much like the Performance Overview in GSC Insights, but everything is limited to the pages, periods, and metrics of this one test.
Test progress
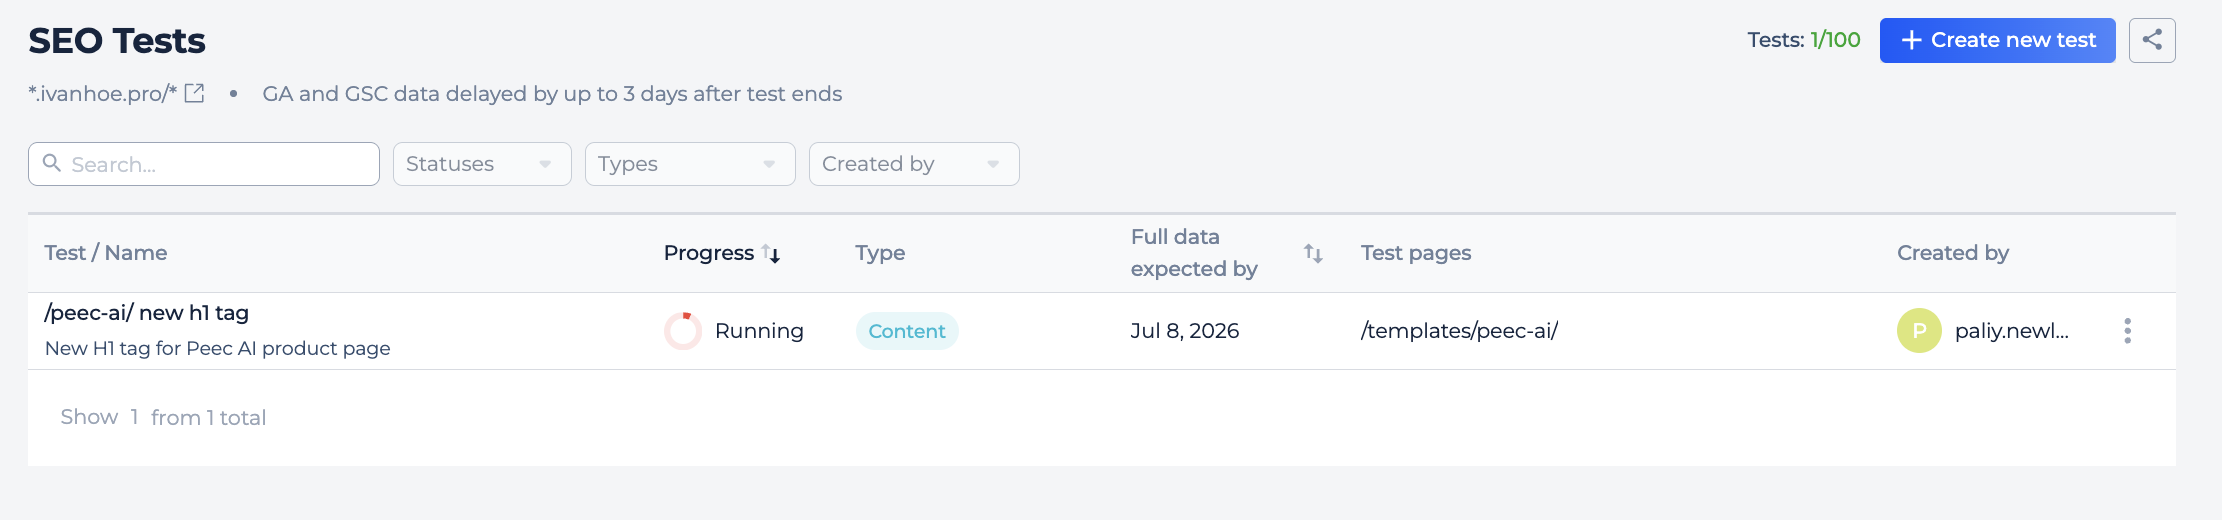
This widget shows the current status of your test and how far it has progressed. The progress bar is based on how much data has actually been processed, not just the calendar, so it reflects how close you are to a complete result.
Data processed up to shows the date the data is currently collected through. Results expected shows when the full result should be ready. Final data from Google can arrive with a delay of up to 3 days, so the result becomes available after all the data has loaded.
Test details

Here you see the setup of your test in one place: the type, description, goal, who created it, and the country, device, and pages it covers. Once the test is finished, the goal also shows the actual result, marked in green if you reached your target and in red if you did not.
Chart
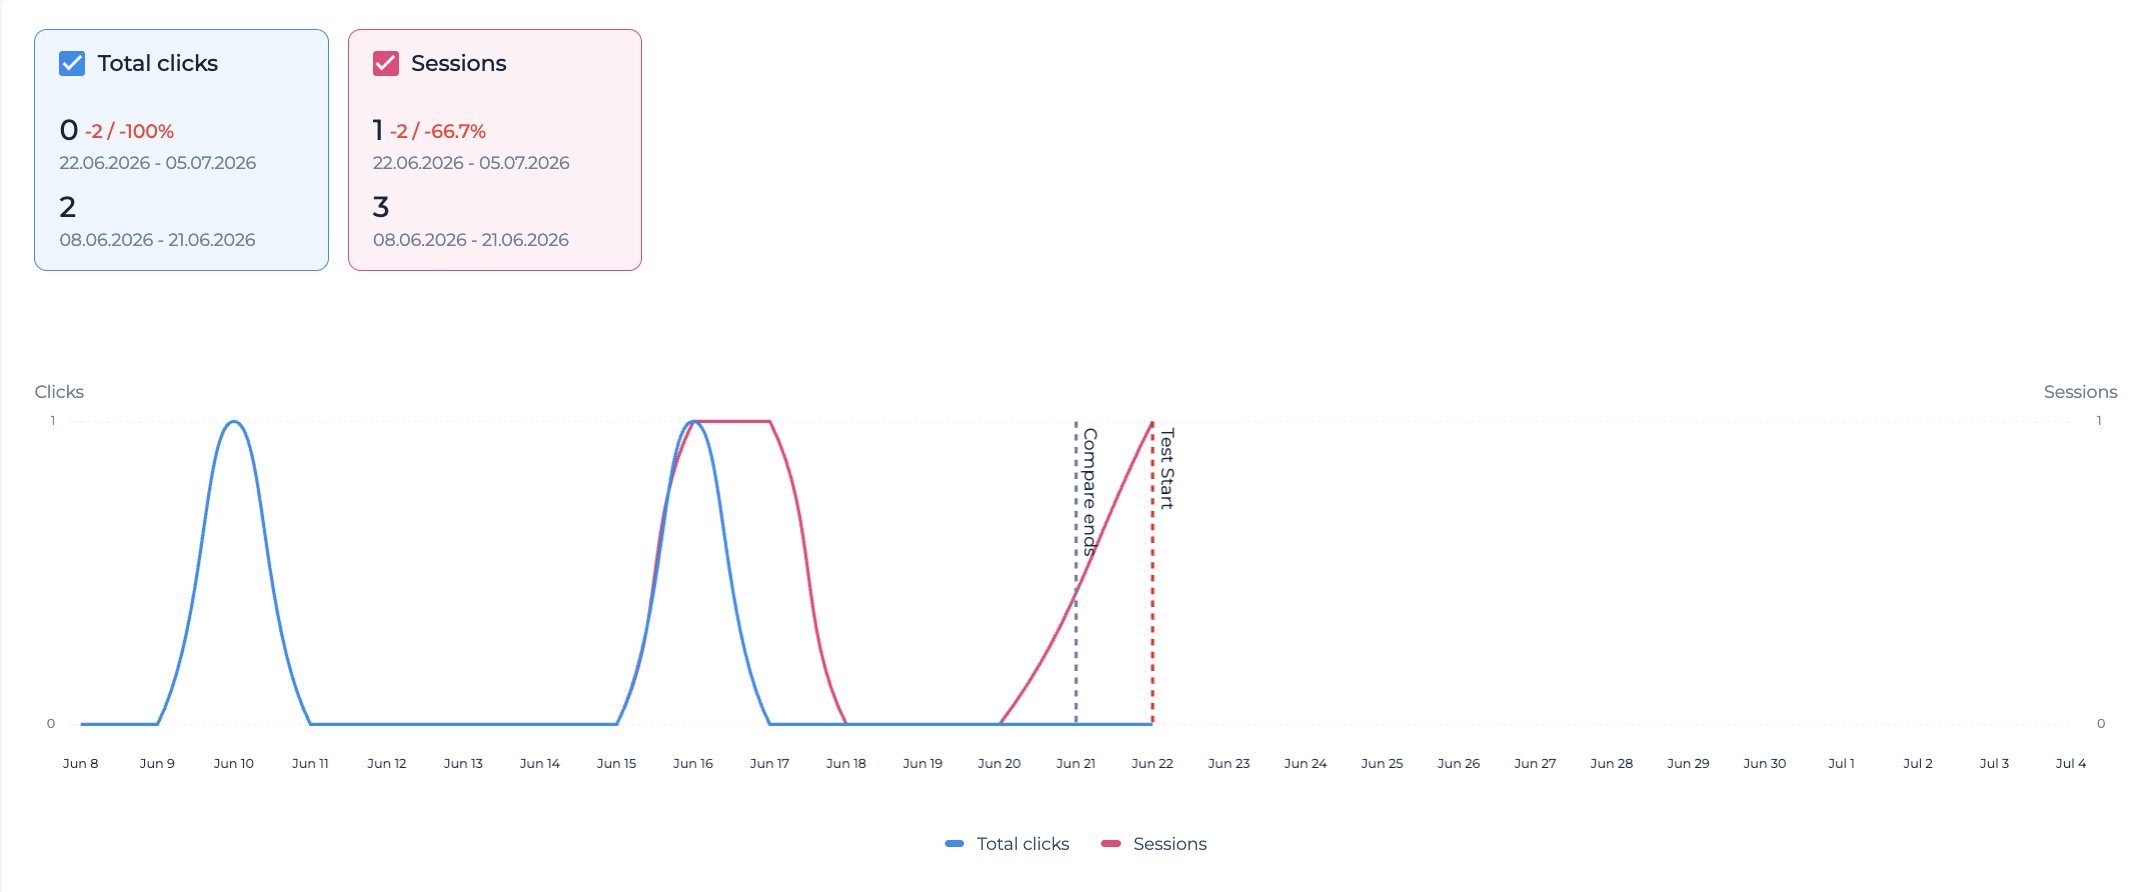
At the top of the chart you see metric cards for every metric you selected, each with the test period value, the comparison period value, and the difference. You can click a card to turn its line on or off on the chart.
Unlike the standard compare view, the chart shows one continuous timeline from the first day of the comparison period to the last day of the test period.
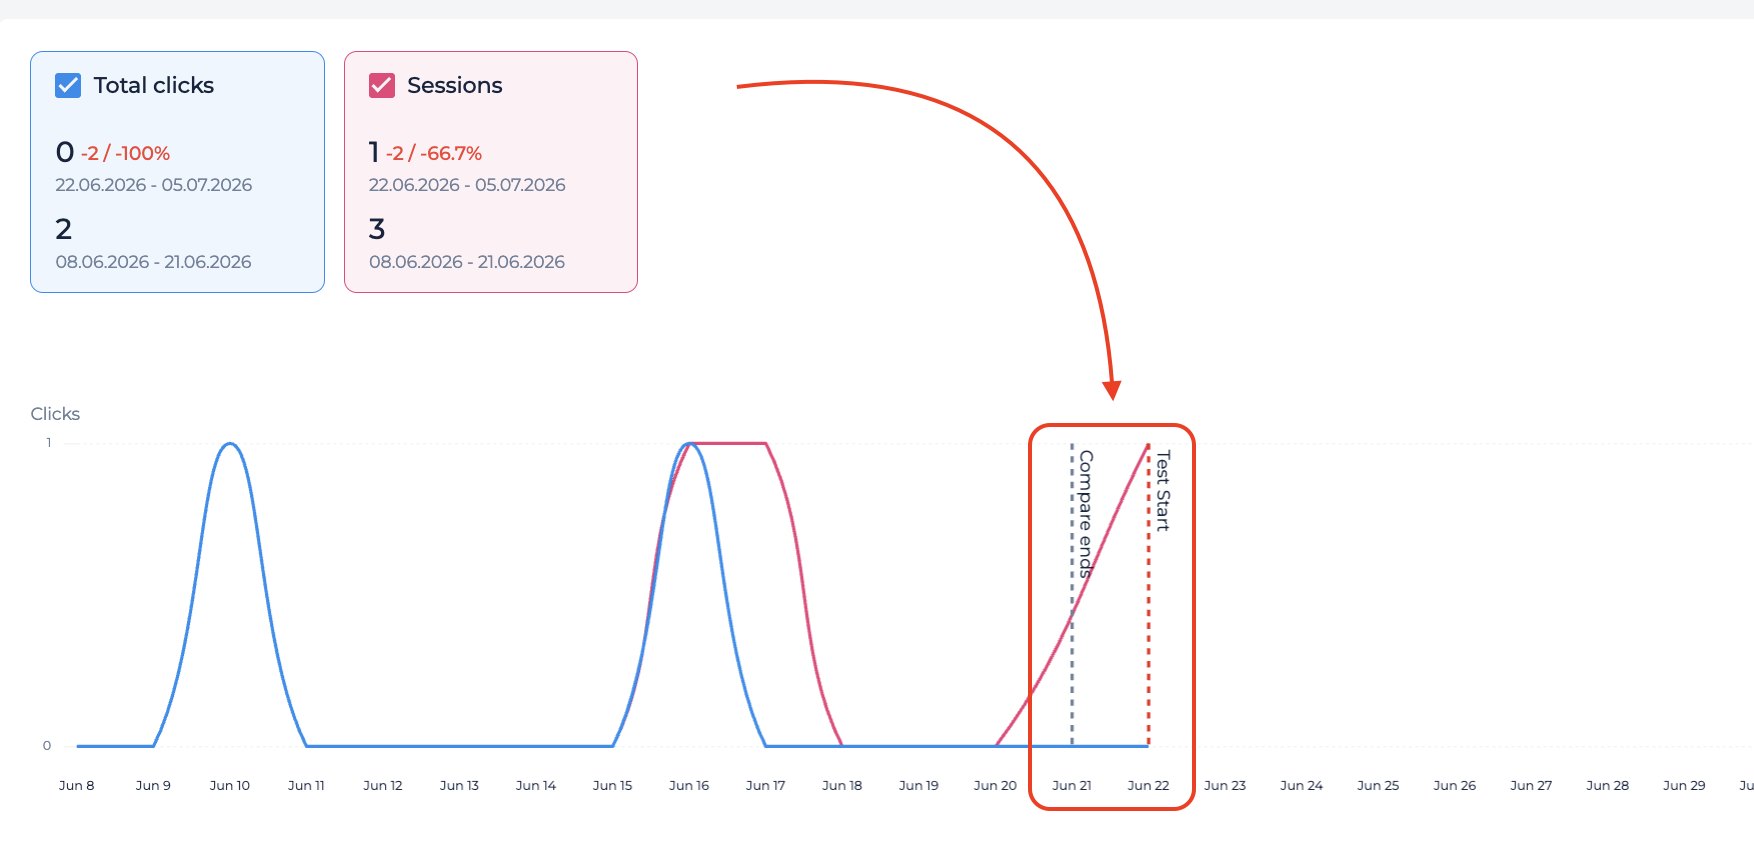
Two dashed vertical lines mark where the comparison period ends and where the test period starts, so you can clearly see the two phases. If there is a gap between them because of day of the week alignment, the gap stays visible on purpose.
While a test is still collecting data, the chart fills in day by day, and the test period values update as new data arrives. At the start a test can look sharply negative because only part of the test period has been collected. That is normal, and the numbers settle as more days come in.
Pages and Keywords table
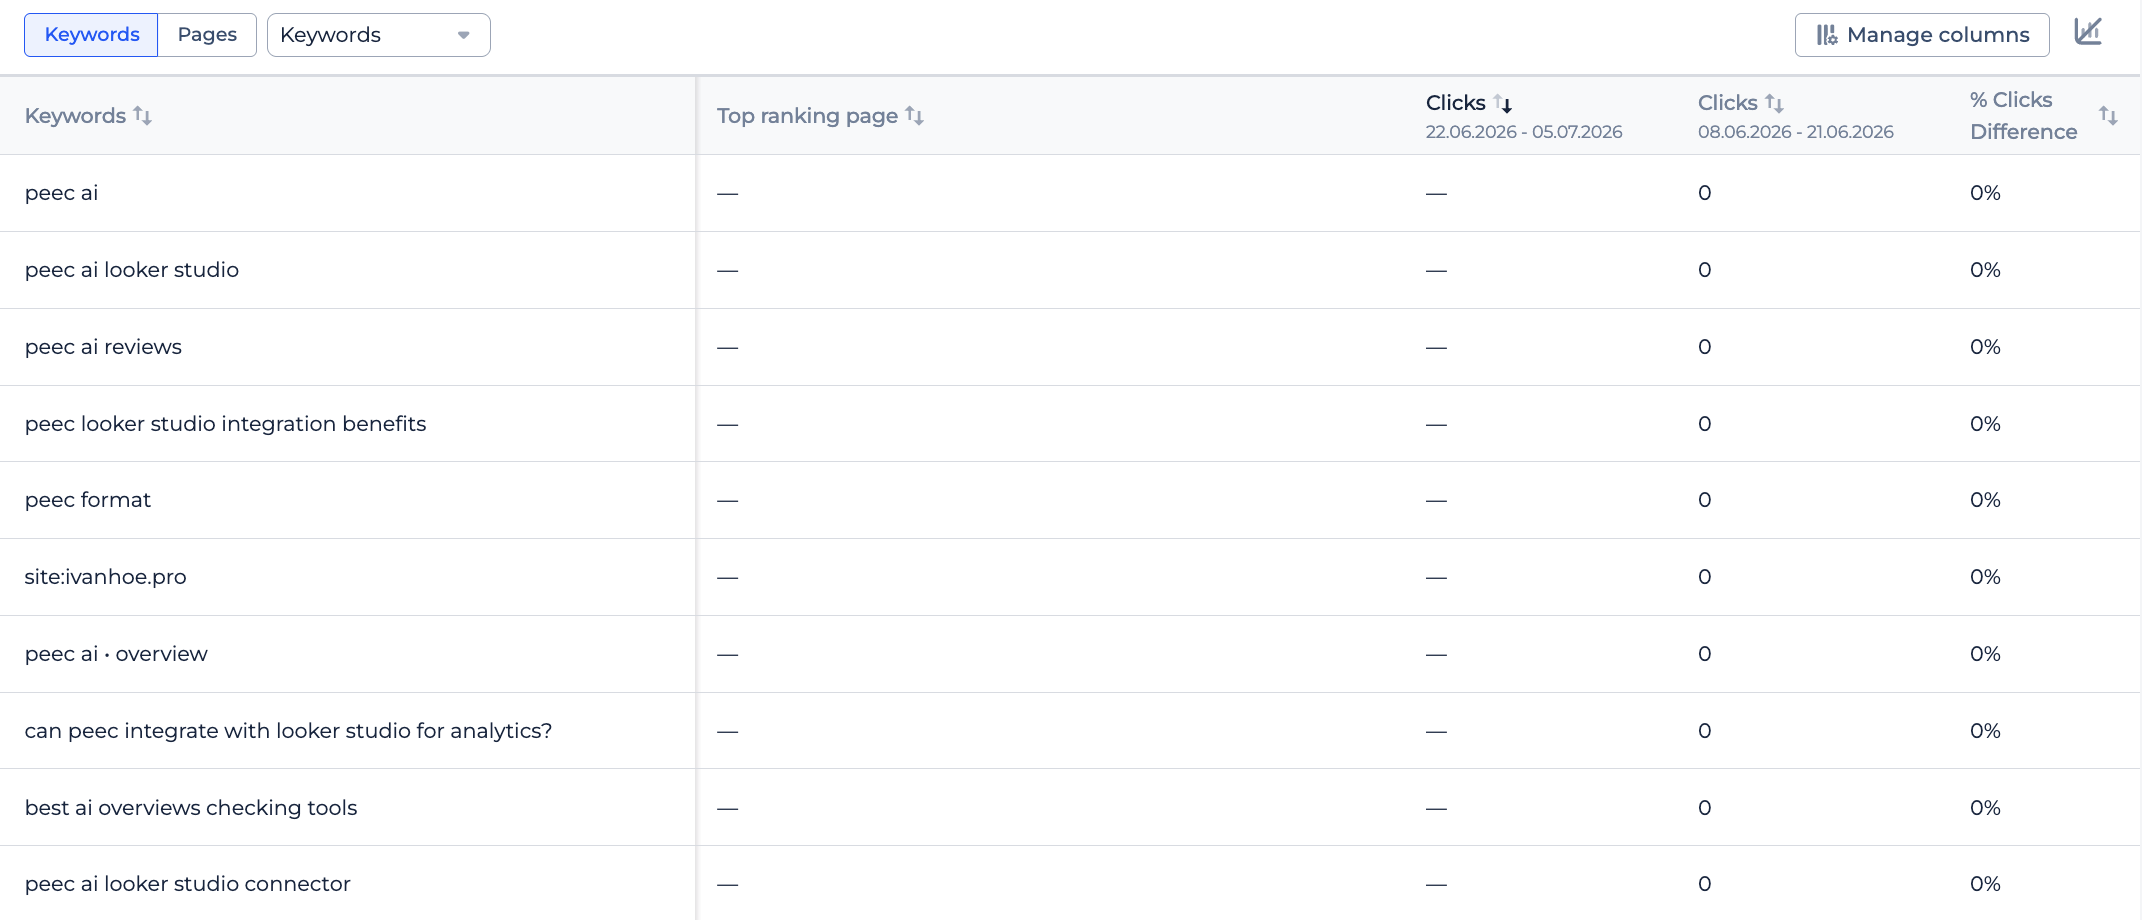
Below the chart you get a table with two tabs, Pages and Keywords. Pages is active by default and shows each page in your test with its top ranking keyword and the metric values for both periods. Keywords shows the same kind of data at the keyword level.
By default the difference is shown as a percentage. Through Manage columns you can also turn on the absolute difference and control which columns are visible. The set of columns depends on the metrics you chose during setup.
If your test uses GA4 metrics, keep in mind they only work at the page level. When you switch to the Keywords tab, GA4 metrics are turned off there, because that data is not available per keyword.
Tests with a control group
If your test has a control group, you get two extra tabs above the filters: Test Group and Control Group.
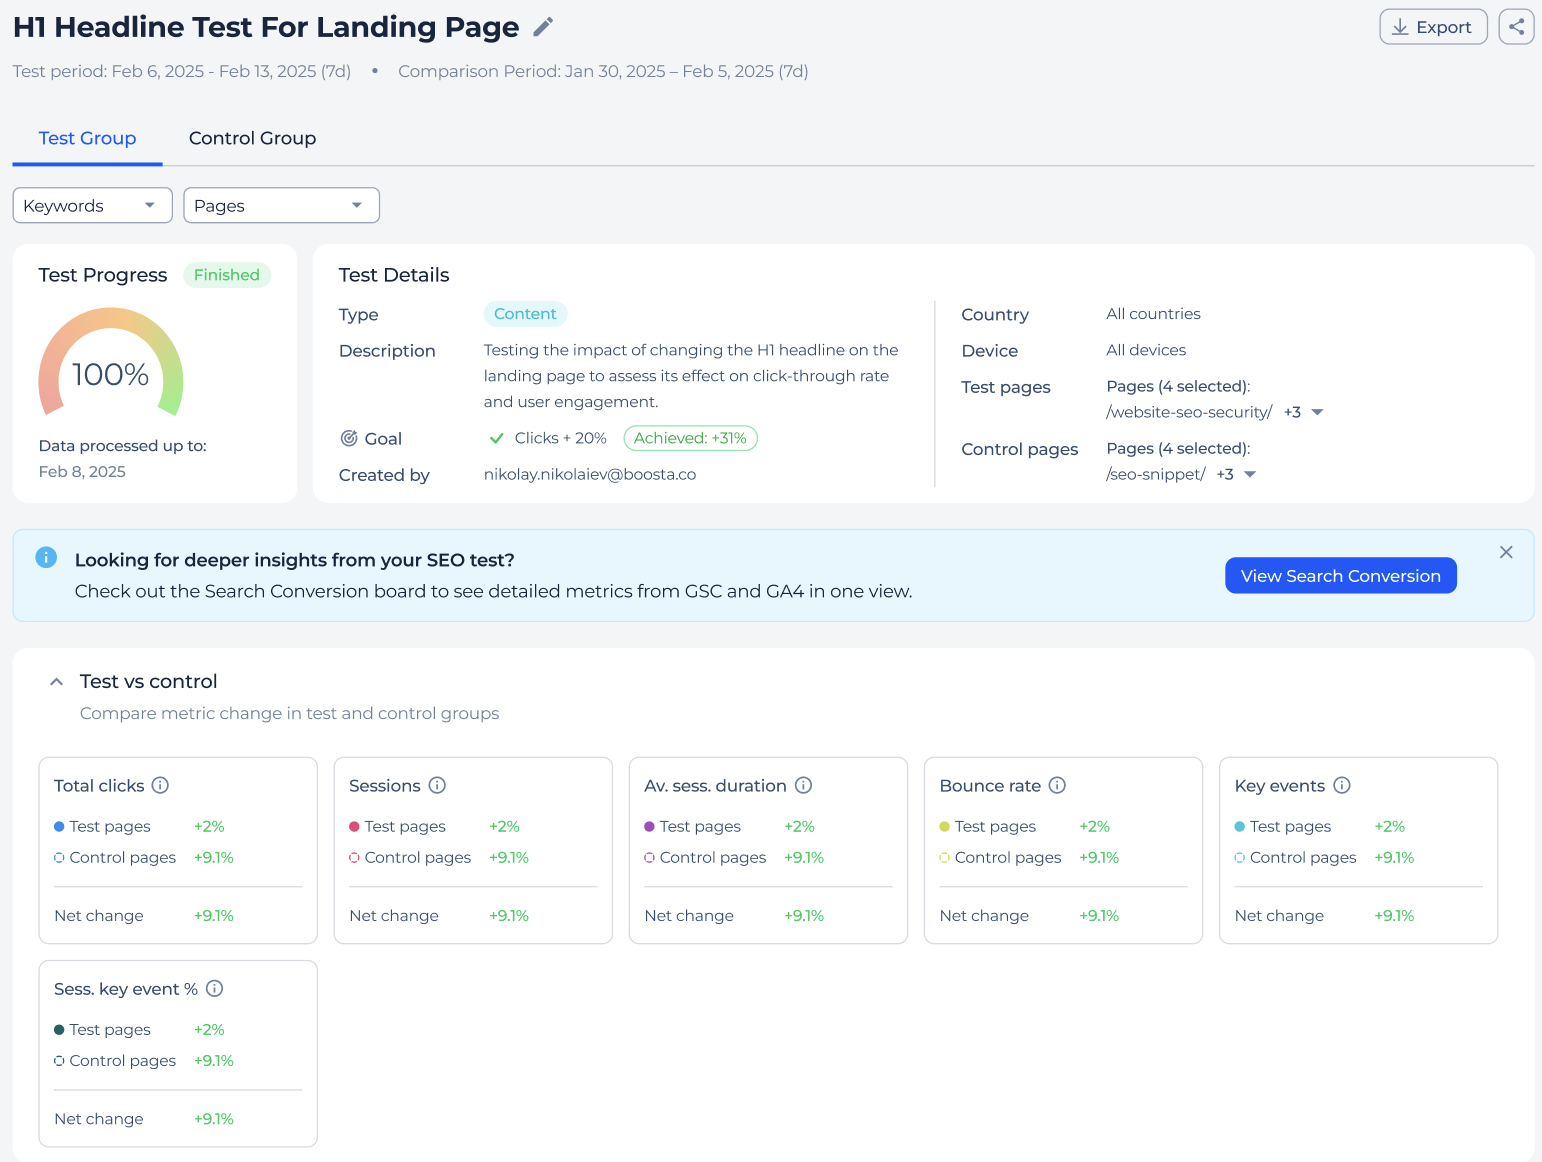
Control Group shows the same chart, cards, filters, and table, but for your control pages. Test progress and test details stay in the Test Group tab only.
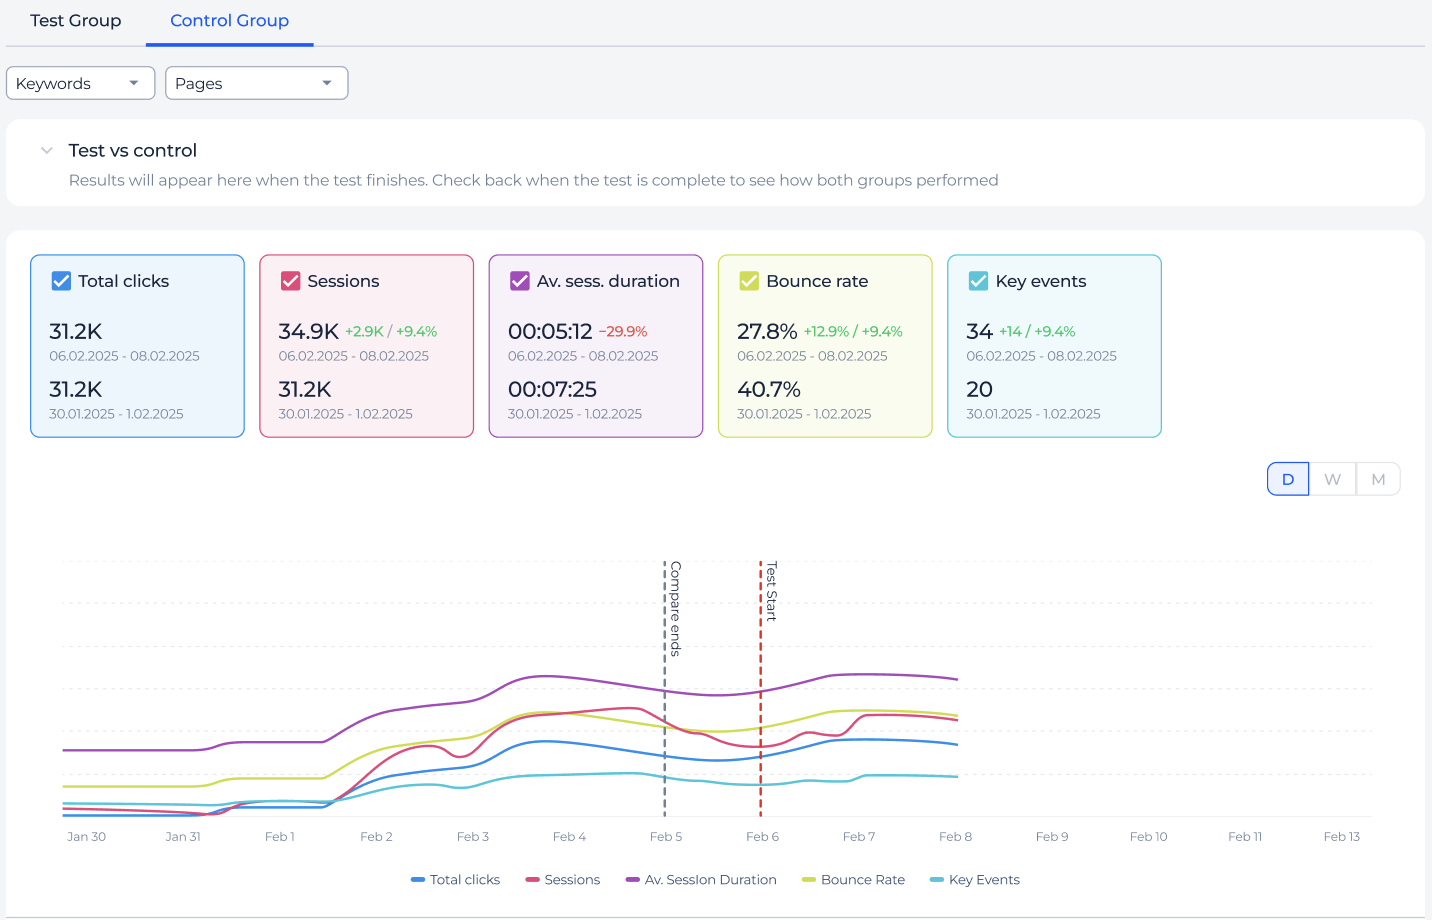
You also get a Test vs Control block. While the test is running this block is locked and shows a notice that results will appear after the test ends. Once the test is finished, it opens up and shows comparative cards for each metric:
- Test pages change, the change for your test group
- Control pages change, the change for your control group
- Net change, the real effect of your change after removing the background trend seen in the control group
For tests with a control group, the goal is measured against the Net change, not the raw change of the test group. This is what lets you separate the effect of your work from general market movement.
Managing your test
Edit the test name or description
You can edit the name and description of a test at any time, no matter its status. Click the edit icon next to the test title, update the fields, and save. This does not affect the test itself, only its name and description.
Change the test period
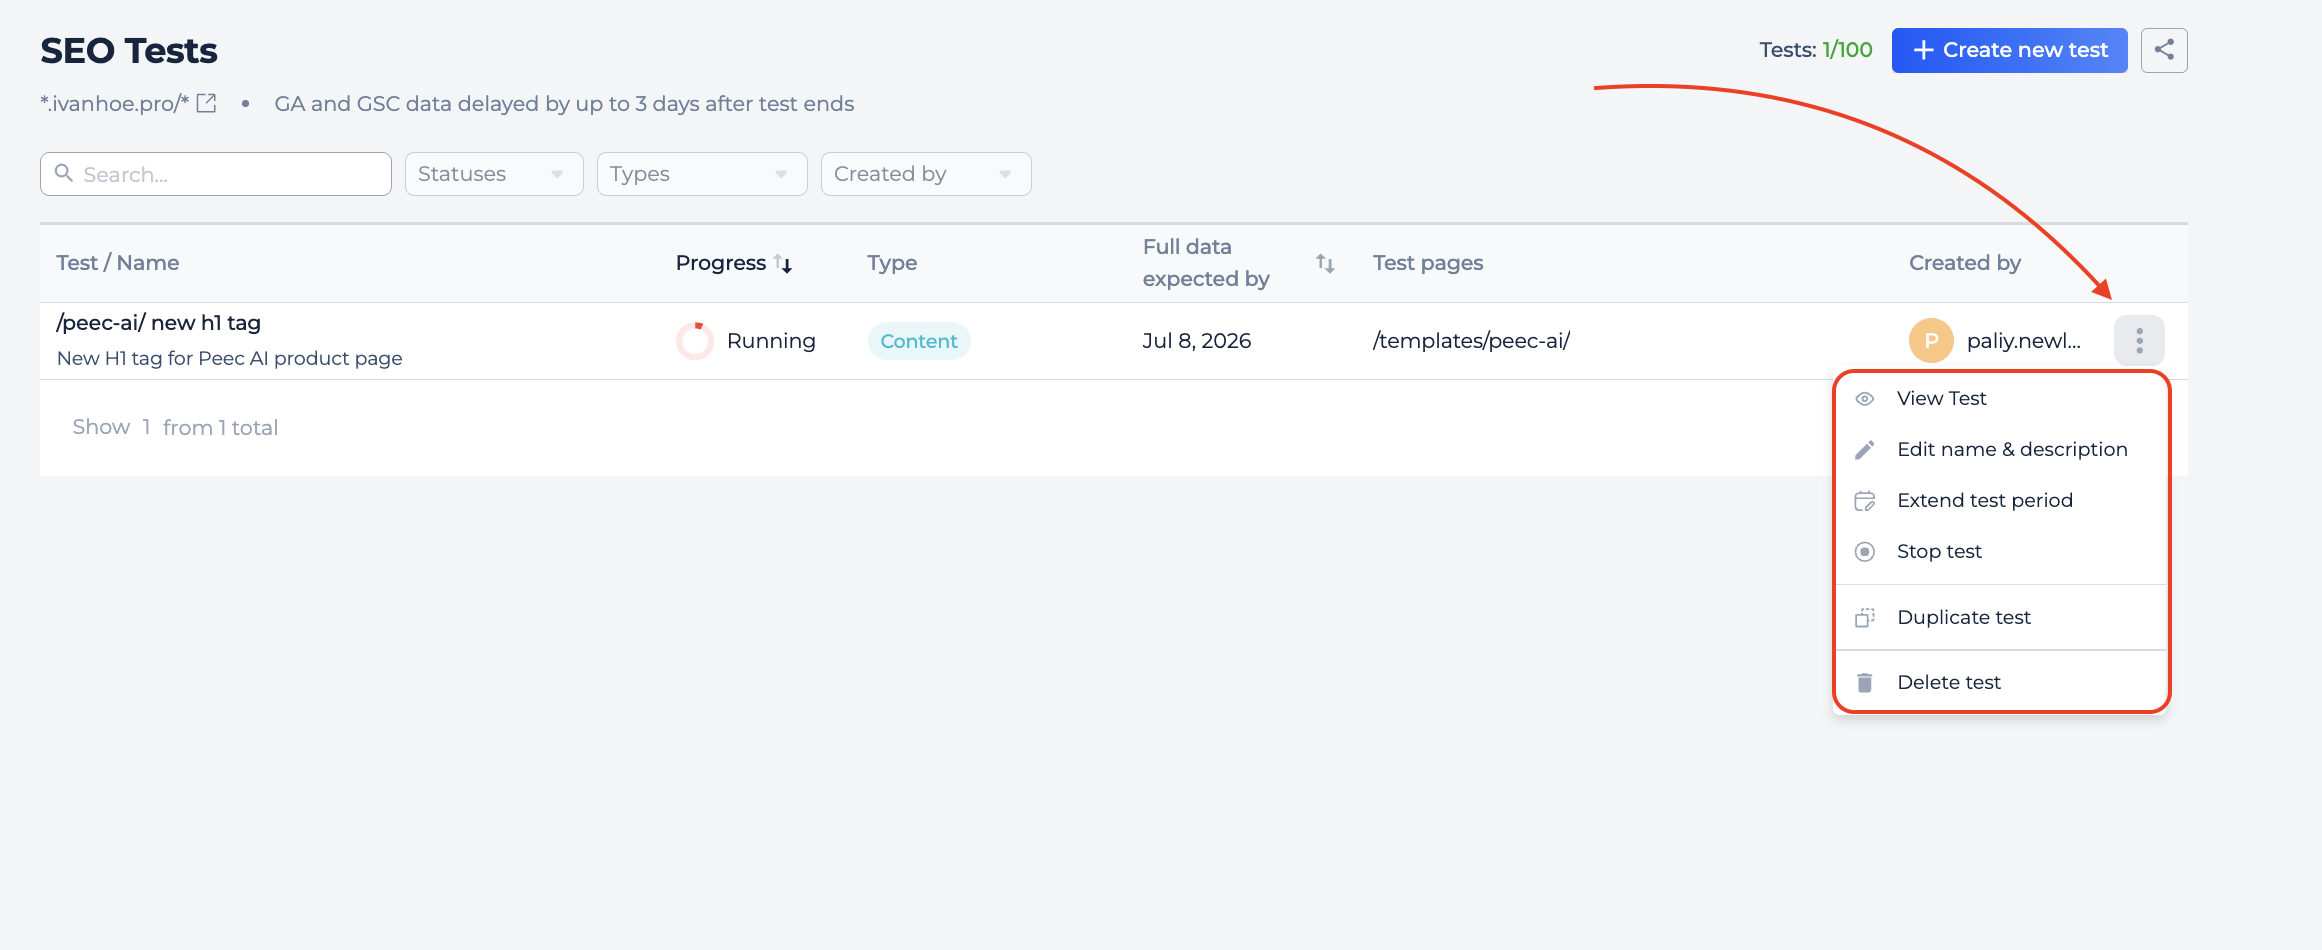
While a test is still in the Queued status, before it starts, you can adjust its period. Click Change test period in the header to reopen the same period setup as in creation and reschedule the test.
Once the test starts running, this option is no longer available.
Extend the test period
While a test is Running, you can give it more time. Click Extend test period and add more days using the presets or a custom value.
Sitechecker recalculates the new end date and rebuilds the comparison period to match. The total length of a test cannot go over 182 days, so any preset or custom value that would cross that limit is blocked.
Stop a test
While a test is Running, you can stop it early. Click Stop test and confirm. After stopping, no new data is collected, the data already gathered stays available, and the test cannot be resumed.
A stopped test stays in your account until you delete it.
Delete a test
Deleting a test is done from the SEO Tests Log, not from the test page itself.
Need help?
If you have any questions about SEO Tests, you can reach us at support@sitechecker.pro. We will be glad to help you out.
Happy Testing!